Drywall How To Manual
Drywall Home | History | Tools | Preparation | Materials | Wallboard InstallationMudding | Finishing Up | Patching | Outlet Install
|
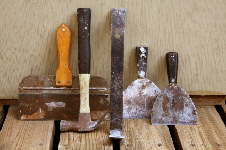
How to Install a Recessed OutletOften, long after drywall has been installed, painted, and wallpapered, it is necessary to add a recessed outlet. These are recommended for usage with wall fountains, lighting for artwork, and to place furniture flush with the wall while utilizing an outlet behind it. The first step is to buy the appropriate junction box. Because drywall is involved, a junction box with wings will be required to ensure that it stays secure when recessed into the wall. Junction boxes without wings are mounted directly on the wall, and are something of an eyesore. A recessed junction box is much less conspicuous, and looks more naturally a part of the room's decor. The size of the junction box is determined by the function of the box: for a regular outlet, choose a small junction box. For major appliances a 4" square junction box is recommended. To install the recessed outlet, cut a hole in the drywall (preferably adjacent to, but not directly over a wall stud). Draw a square where you wish to place it, using the box as a guide. Drill a half-inch hole near one of the corners, then cut out the spot using a keyhole saw. Make sure this hole is barely large enough for the junction box to be wedged in. The most difficult part will be getting a wire to where the box is to be installed. Generally, this can be done from the attic above or the basement from below. Drill a half-inch hole in the foot plate of the wall and push the wire through the hole from another junction. When sufficient wire is pushed through the hole, it can usually be easily accessed through the hole in the drywall. Once the wire has been pushed through the hole provided in the new junction box, the box can be secured to the wall (and perhaps the stud) and then patched with plaster. Now the outlet can be installed. As always, when working with electricity, safety is paramount. Make sure the power is off! Check the breaker box before proceeding. Make sure the wires are pulled out of the junction box far enough to allow them to be easily spliced. For appliances, a mud-ring will be necessary. These can be as deep as ½ inch, or they can be completely flat. Install the mud-ring; this will enable the outlet to be mounted. (For an ordinary outlet like that used with an indoor fountain, a mud-ring is not necessary.) Install a 4" ground wire into the junction box by hooking it around a ground screw. (The wire is bent over with a pair of pliers to resemble the crook of a shepherds staff.) Twist the existing ground wires and the new ground wire together with a pair of lineman's pliers. Keep the black and white wires out of the way on this step. Cap the twisted ground wires and push them to the back of the junction box. With the other end of the fourth ground wire, make a shepherd's hook and connect it to the green terminal screw on the new outlet. Twist the ground screw firmly. Now attach the white wires to the silver terminal screws and the black wires to the brass terminal screws. To prevent short circuiting, wrap your terminal screws in a layer of electrical tape. Then, push the outlet back into the junction box so the wires bunch up evenly. Then screw the outlet into the junction box. The job is complete! |
Mudding | Finishing Up | Patching | Outlet Install
Contact Us | Privacy Statement | Laptop Repairs